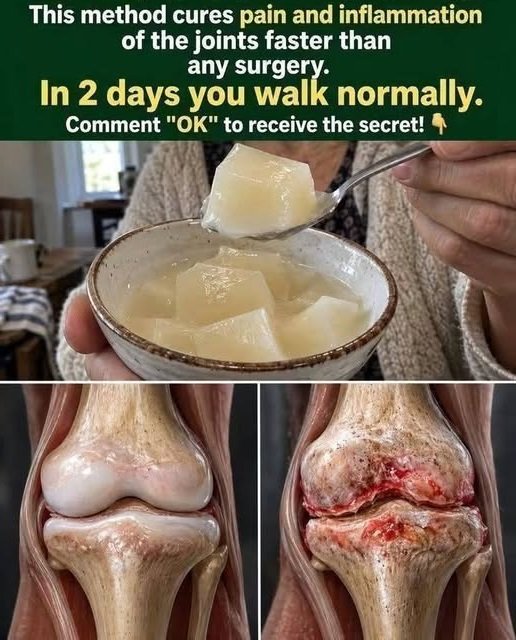
Gelled bone broth jelly is a concentrated homemade broth that transforms into a firm, trembling gel when chilled. Made with collagen-rich beef bones, optional chicken feet or oxtail, apple cider vinegar, and aromatic herbs, this savory preparation is a versatile addition to soups, sauces, gravies, and warm morning drinks.
The secret to a good gelatin-rich bone broth is choosing bones with plenty of connective tissue, maintaining a gentle simmer, straining the broth carefully, and reducing it until it reaches the desired concentration. When chilled, the natural gelatin can create a spoonable texture without adding commercial gelatin.
Recipe Overview
- Prep & Blanching Time: Approximately 25 minutes
- Roasting Time: 40–45 minutes
- Acid Soak Time: 30 minutes
- Extraction Simmer Time:
- Stovetop / Slow Cooker: Approximately 12–24 hours, depending on the appliance and recipe method
- Electric Pressure Cooker (Instant Pot): Approximately 3.5–4 hours at high pressure, depending on bone size and appliance instructions
- Straining & Reduction Simmer Time: Approximately 1.5–2 hours, or until sufficiently concentrated
- Chilling & Setting Time: 6–8 hours or overnight
- Total Time: Approximately 21–34 hours using the long-simmer method, or less with a pressure cooker
- Yield: Approximately 8–10 cups before final reduction; the finished yield will vary
- Skill Level: Beginner to Intermediate
- Texture Profile: Firm, spoonable savory jelly when cold; rich, smooth broth when warmed
- Flavor Profile: Deep, savory, earthy, and aromatic, with notes of garlic, ginger, thyme, and black pepper
Cooking times and final yield vary according to the bones used, the amount of water, the cooking appliance, and how much the broth is reduced.
Equipment Needed
- Large 8–12-quart heavy-bottomed stainless steel stockpot, slow cooker, or appropriately sized electric pressure cooker
- Large rimmed baking sheet for roasting the bones
- Fine-mesh stainless steel sieve
- Multi-layer cheesecloth or a food-safe nut milk bag
- Tongs and a large stainless steel skimmer
- Shallow heat-safe containers or glass jars for chilling the finished broth
- Silicone spatula
- Food thermometer, if available, to monitor safe cooking and cooling temperatures
Ingredients
1. High-Collagen Bone Selection: The Gel Factor
- Beef or Veal Knuckle Bones and Split Feet: 4–5 lbs (approximately 2–2.3 kg)Knuckle bones, joints, and feet contain connective tissues that can release gelatin during prolonged cooking. These are useful choices when your goal is a broth that sets firmly after chilling.
- Chicken Feet or Beef Oxtail (Optional): Approximately 1 lb (450 g), trimmed and cleanedAdding chicken feet or oxtail can increase the amount of connective tissue in the broth and may help create a thicker gel, depending on the bones and cooking method.
2. The Acid Ingredient and Water
- Apple Cider Vinegar: 1/3 cup (approximately 80 ml)The acidity can help dissolve some minerals from the bones during cooking. It does not guarantee a specific nutrient concentration or a stronger gelatin set.
- Cold Drinking Water: Enough to cover the bones by approximately 2–3 inches (5–6 cm), as the pot allows
3. Aromatics and Seasonings
- Fresh Ginger Root: One 2–3-inch piece, sliced
- Fresh Turmeric Root: One 1-inch piece, lightly crushed, or 1 teaspoon ground turmeric
- Fresh Garlic: 1 whole head, cut horizontally in half
- Dried Bay Leaves: 3 leaves
- Whole Black Peppercorns: 1 tablespoon
- Fresh Thyme Sprigs: 5–6 sprigs
- Fine Sea Salt: 1 teaspoon, or to taste
Keep the initial seasoning light because the flavor and saltiness may become more concentrated during reduction. Ginger, turmeric, and garlic add flavor, but this recipe should not be considered a treatment for inflammation or joint disease.
Step-by-Step Instructions
1. The Purification Blanch
Place the raw bones in a large stockpot and cover them with cold water. Bring the water to a rolling boil and blanch for approximately 10–15 minutes.
Foam and residue may collect on the surface. Drain the bones carefully through a colander, rinse them under running water, and clean the stockpot before continuing.
This step helps remove surface residue and can produce a cleaner-tasting broth. It is a culinary preparation step, not a substitute for cooking the broth safely.
2. High-Heat Roasting
Preheat your oven to 220°C (425°F). Arrange the blanched bones in a single layer on a rimmed baking sheet.
Roast for 40–45 minutes, turning the bones once halfway through, until they are deeply browned and fragrant.
Roasting develops a richer, more savory flavor and gives the finished broth a darker amber color. If you prefer a lighter-tasting broth, you can skip this step, although the flavor will be different.
3. The Acid Soak
Transfer the roasted bones to a clean stockpot or slow cooker.
Pour approximately 1/2 cup of warm water onto the roasting tray and scrape up the browned bits with a wooden spoon. Add this flavorful liquid to the pot.
Pour in the apple cider vinegar, then add enough cold water to cover the bones by approximately 2–3 inches.
Let the mixture stand for about 30 minutes in the refrigerator before heating. This short soak allows the acidic liquid to contact the bones before cooking begins.
4. The Long Extraction Simmer
Add the ginger, turmeric, garlic, bay leaves, black peppercorns, thyme, and sea salt.
- Stovetop Method: Bring the liquid to a gentle simmer, then reduce the heat so the surface shows only small, occasional bubbles. Partially cover the pot and simmer until the broth develops a rich flavor and gelatinous body. A long cooking period may be needed for large, collagen-rich bones. Check the pot regularly and add hot water if needed to keep the bones covered. Do not leave a stovetop unattended for extended periods.
- Slow Cooker Method: Follow your appliance’s instructions for cooking bones and broth. Use a setting that maintains safe cooking temperatures, keep the lid in place, and avoid exceeding the manufacturer’s recommended cooking time.
- Electric Pressure Cooker Method: Add the ingredients without exceeding the appliance’s maximum fill line, especially when using bones. Secure the lid and follow the manufacturer’s guidance for pressure-cooking stock or broth. A cooking period of approximately 3.5–4 hours at high pressure may be suitable for some batches, depending on the bone size and appliance. Allow pressure to release according to the manufacturer’s directions.
A gentle simmer can help keep the broth from becoming excessively cloudy. However, boiling does not automatically destroy all the gelatin or prevent the broth from setting; the final result depends largely on the amount of gelatin extracted and the concentration of the liquid.
5. Double Filtration
Turn off the heat and carefully remove the large bones with tongs and a skimmer.
Place a fine-mesh sieve lined with clean cheesecloth over a heat-safe container. Ladle or carefully pour the broth through the sieve, working in batches if necessary.
Allow the liquid to drain naturally. Avoid squeezing the solids if you want a clearer broth.
Discard the cooked bones and strained solids safely. Do not taste or eat bones that have been cooked for a long time, as they may become brittle.
6. The Concentration Reduction
Pour the strained broth into a clean pot and bring it to a gentle simmer, uncovered.
Continue cooking for approximately 1.5–2 hours, checking the liquid regularly and stirring when needed to prevent sticking.
The goal is to evaporate some of the water and concentrate the natural gelatin. There is no guaranteed reduction percentage or fixed cooking time that will produce a firm gel in every batch.
For a more reliable result, place a small spoonful of broth in a chilled dish and refrigerate it briefly. If it becomes noticeably thick and gel-like, the broth may be concentrated enough. If it remains very liquid, continue reducing it and test again.
Be careful with salt during this stage because the flavor becomes more intense as water evaporates.
7. Chill and Remove the Fat
Divide the hot broth into clean, shallow, heat-safe containers to help it cool quickly. Refrigerate promptly rather than leaving the pot on the counter for an extended period.
Once the broth is thoroughly chilled, it may set into a firm, trembling amber-colored jelly. The consistency depends on the amount of gelatin extracted and the final water content.
A layer of fat may solidify on the surface.
- Use a spoon to lift away the chilled fat cap if you prefer a lower-fat broth.
- Keep the remaining broth covered in the refrigerator.
- If the broth does not set firmly, it can still be used as a flavorful cooking broth or reduced further after reheating.
A gelled texture is a sign of gelatin in the broth, but it does not indicate a specific amount of protein, minerals, or other nutrients.
How to Portion, Slice, and Enjoy Bone Broth Jelly
- Savory Gelatin Cubes: If the chilled broth sets firmly in a shallow dish, cut it into small cubes and store them in a covered container. Use the cubes as a convenient ingredient in soups, sauces, or other dishes. Eating them cold is a personal preference, not a proven joint-health treatment.
- Warm Morning Cup: Add approximately 1/2 cup of gelled broth to a mug or small saucepan. Heat until steaming hot and completely liquid. Add a squeeze of lemon juice or a pinch of seasoning if desired.
- Cooking Fortifier: Stir a spoonful of gelled broth into vegetable soups, pan gravies, pasta sauces, stews, or rice. It can add savory flavor and body without needing to prepare a fresh batch of broth.
Bone broth can contribute protein to the diet, but its exact nutritional value varies by recipe. It should complement a balanced diet rather than replace a varied range of protein sources.
Storage Guidelines
- Refrigerator: Store the finished broth in covered, airtight containers at 4°C (40°F) or below and use it within 3–4 days. Refrigerate promptly, preferably in shallow containers so it cools quickly. Do not rely on smell or appearance alone to determine whether stored broth is safe. <Cite refs={[“turn165651search0″,”turn165651search2”]}/>
- Freezer Storage: For longer storage, freeze the broth in meal-sized portions in freezer-safe containers, leaving room for expansion. For best quality, use frozen broth within approximately 2–3 months. Thaw in the refrigerator or reheat safely from frozen when appropriate.
- Reheating: Reheat only the portion you plan to use. Bring broth or soup to a rolling boil when reheating, or use a food thermometer to ensure leftovers reach 74°C (165°F). Avoid repeatedly cooling and reheating the same batch. <Cite refs={[“turn165651search0″,”turn165651search1”]}/>
Nutritional Analysis
The nutrition of homemade bone broth jelly depends on the type and quantity of bones, the amount of gelatin extracted, the final volume, the amount of fat removed, and the seasoning used.
The figures below are illustrative estimates, not laboratory-tested nutrition data. They should not be presented as exact values for every serving.
| Nutritional Metric | Approximate Amount per 1/2-Cup Serving |
|---|---|
| Calories | Varies by recipe |
| Protein, including gelatin | Varies by extraction and reduction |
| Total Carbohydrates | Usually very low |
| Dietary Fiber | 0 g |
| Sugars | Usually very low |
| Total Fat | Depends on how thoroughly it is defatted |
| Saturated Fat | Depends on the remaining fat |
| Cholesterol | Depends on the bones and fat content |
| Sodium | Depends on the amount of salt added |
| Potassium | Varies |
| Calcium | Varies |
| Magnesium | Varies |
| Phosphorus | Varies |
| Glycine | Not reliably estimated without analysis |
| Proline and Hydroxyproline | Not reliably estimated without analysis |
| Glucosamine and Chondroitin | Not reliably estimated without analysis |
| Iron | Varies |
For accurate nutrition information, calculate the recipe using the actual ingredients and final yield, or have a sample analyzed by a qualified laboratory.
Final Thoughts
Homemade gelled bone broth is a practical way to make a rich, flavorful cooking base from collagen-rich bones. With careful preparation, a steady simmer, sufficient reduction, and proper chilling, the broth may set into a natural savory jelly that can be portioned for convenient use.
Enjoy it as part of a balanced diet, and remember that although collagen-derived products have been studied for joint symptoms, the nutritional composition of homemade bone broth varies considerably. This recipe alone cannot guarantee improvements in joint health or reduce inflammation.